
Having the option to change a bicycle’s inner tube is the main upkeep expertise any cyclist ought to master.
In addition to the fact that it is the maintenance your bicycle will require the most frequently, it’s likewise conceivable to do at home with a touch of master counsel – saving you expensive and superfluous excursions to the technician.
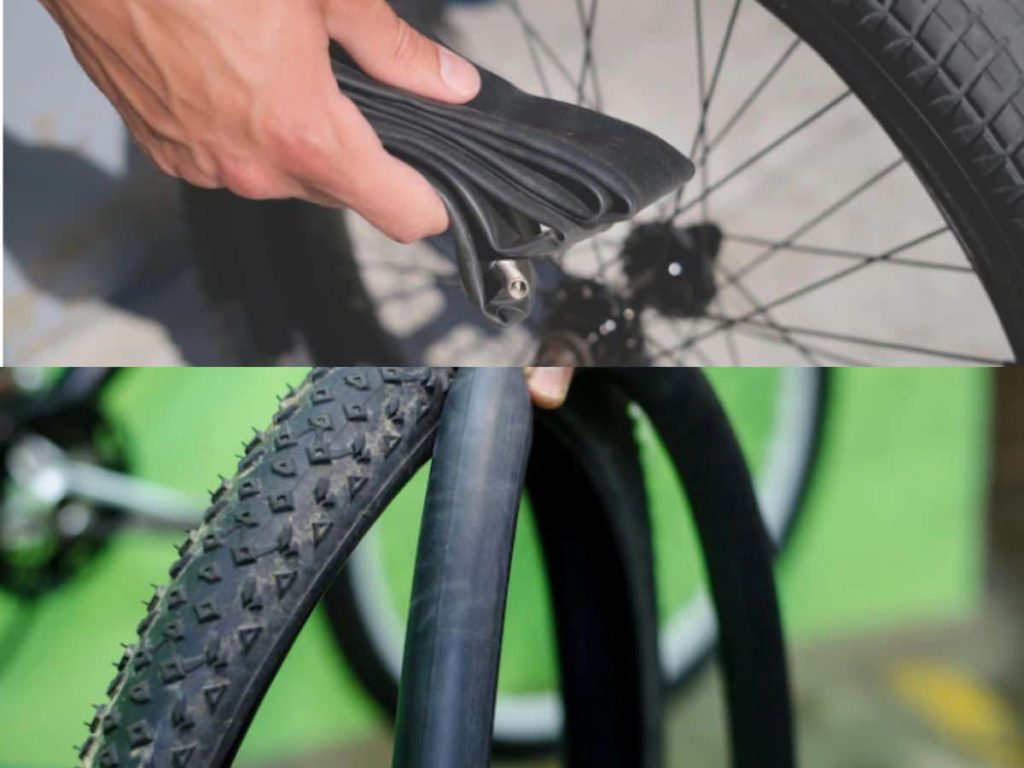
Most bicycle tires have two principal parts: the external tire (the extreme, grippy layer of elastic that connects with the ground) and the inward cylinder (the inflatable ring which holds in the air). In this way, when you have a punctured tire, you’re bound to have to know how to supplant a bicycle’s inward cylinder than how to change a bike tire.
Penetrates are an undeniable unavoidable truth for cyclists. Having the expertise of How To Change The Inner Tube On A Bicycle for yourself is the contrast between riding again inside a couple of moments and sitting along the edge of the street hanging tight for a taxi!
Not all bicycles are something similar. This Instructable purpose is a street bicycle. You might have to adhere to marginally various guidelines for How To Change The Inner Tube On A Bicycle.
Apparatuses Required:
- Screwdrivers/Bike Tire Lever
- Wrench
- Substitution Inner cylinder
- Pneumatic machine
Wellbeing Info: Be cautious while managing moving parts, as you might get squeezed
Assuming you’re confounded at any step, check the photographs given. Inscriptions have been added to some of them for additional clarity.
Table of Contents
You Might Also Like ⇒
- Rowing Machine Vs Treadmill
- Best Exercise Machines To Lose Weight
- Best Aerobic Stepper
- Best Exercise Ball Chair
- Best Home Gym Equipment
- Best Fitness Bikes
- Does Biking Work Abs
- Exercise Pedals For Elderly
- Best Dual Action Exercise Bike
- Best Exercise Bike Under 300
- Best Exercise Bike Under 500
- Best Folding Exercise Bike
- Cycling Machine For Exercise
- Best Upright Exercise Bike
- Best Dumbbells For Home Gym
Instruction: How To Change The Inner Tube On A Bicycle In 2022
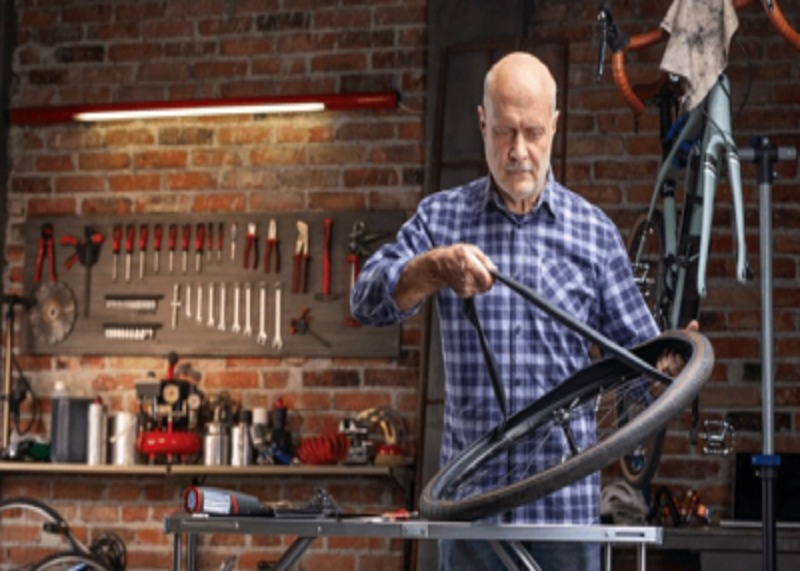
Stage 1: Removing The Wheel From The Bike
- Flip the bicycle over so it is laying on the seat and handlebars.
- Assuming the tire is toward the front, relax the bolts on one or the other side of the tire.
- In the event that the tire is toward the back, you should eliminate the chain from the stuff prior to continuing on toward the subsequent stage.
- Utilizing a wrench, unscrew the screws on one or the other side of the tire
- Pull the chain off while pivoting the pedals
- Take the wheel off the bicycle outline.
Stage 2: Use The Tire Switch To Dispose of The Internal Tube
- Be wary when you utilize a tire switch. Eliminate the residue cap from the valve stem, then, at that point, eliminate the clasp. Place the two switches around 2 centimeters or 1 inch separated under the dab, with the scoop part under the tire’s dab.
- To keep away from penetrating, guarantee that you haven’t caught the internal cylinder valve against the edge with the opposite side.
- Apply strain to one of the switches to lift the tire over the edge, then rehash this on the other switch to get a bigger region free from the tire. To stay away from the tire slipping back onto the edge, snare a solitary piece of the tire switch around the closest talked.
- Assuming that the tire is very close, you might need to utilize two switches simultaneously to pry the bicycle tire over the bike edge.
- Be cautious in the event that you utilize two switches to manage a very close tire, as there is typically a peril of flying parts.
- Circumvent the wheel, eliminating the tire’s edge from the edge. Observe that you are not eliminating the tire. Just a single side of the tire should be taken out (keep the far side where it is).
- Work the tire switch around the whole tire until the inward cylinder is altogether off the bicycle tire. Steadily draw the internal cylinder out in the wake of pushing the valve back through its opening.
Stage 3: Examine What Caused The Cut
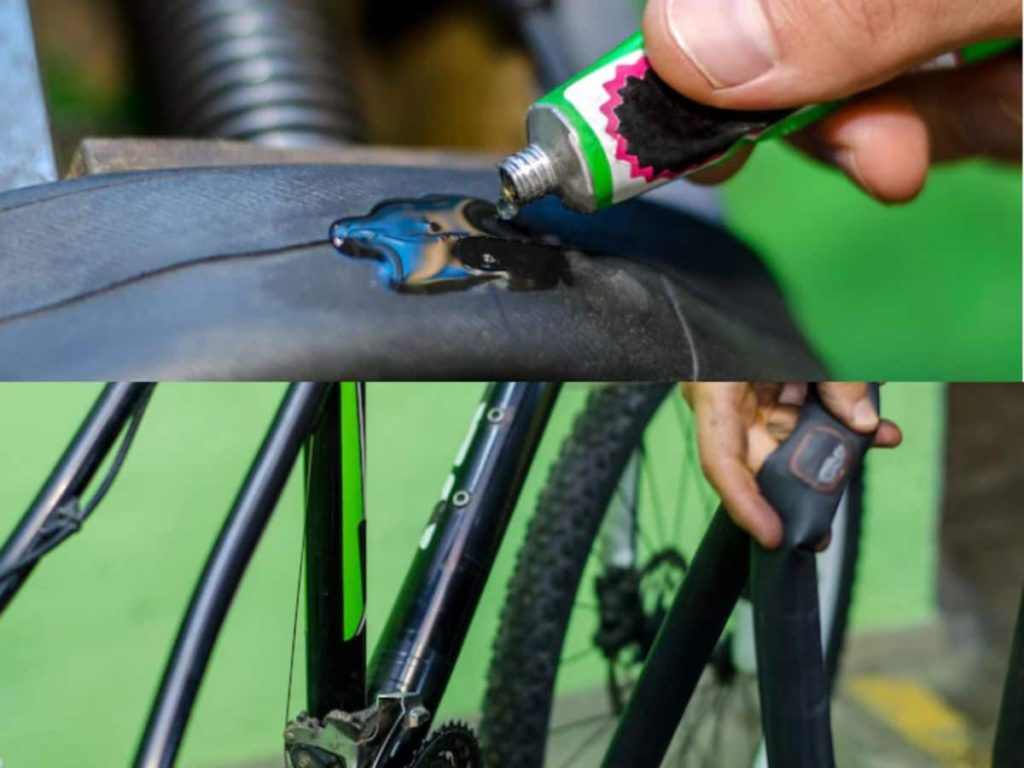
- With the inside tube disengaged, assess the tire for any disfigurations or track bursts. To some degree fill the inward cylinder. You ought to have the option to hear or feel a little air escape from the opening. Whenever you’ve found the opening in the cylinder, coordinate it with the tire.
- Examine for spikes, nails, and different articles that might have invaded the tire and remove them. Or, more than likely they will penetrate the new interior tubing. Check the wheel edge for sharp edges and parts too.
- A squeeze cut is in all likelihood in the event that the opening is on the inward boundary of the cylinder. At the point when the tire got the cylinder, the edge tape was either not in the appropriate spot or not present by any means. If so, utilize intense wariness while re-embedding the cylinder.
- Be mindful when you analyze the inward cylinder. You would rather not cut yourself as you run your fingers around the tire’s interior region. Make this step simpler by wearing gloves.
- Eliminate the items by hand from the cylinder on the off chance that you see something clear like glass or a nail. In the event that it’s especially obstinate, utilize the screwdriver to haul it out. Then, utilize the towel to rub around within the tire to check whether it sticks on anything more.
- Whenever you’re happy with the tire’s condition, place the tire name over the valve opening. Now is the ideal time to embed another cylinder into your bicycle.
Stage 4: Removing The Inner Tube
- Remove the cap from the valve, and eliminate the latch
- Stick switch or in the middle of between the tire and wheel
- Circumvent the wheel, taking the edge of the tire out of the edge. Note that you are not taking the tire off. Just a single side of the tire should be taken out.
- Take out the internal cylinder
- Look at the tire for whatever might penetrate the new internal cylinder.
Stage 5: Inserting The New Inner Tube
- Get a new inward cylinder, and ensure it is the right size and type. You can find the right size on the tire or the inward cylinder you recently eliminated.
- Embed the new internal cylinder by putting the valve inside the edge first
- Embed the remainder of the internal cylinder into the tire. When the inward cylinder is half in, you can marginally blow up it to make this step simpler.
- Press the tire once more into the wheel.
- Fold the tire once again into the edge while turning the wheel. As you’re doing this, make certain to make sure that the piece you’ve wrapped back up isn’t emerging
- At the point when the tire is close to as far as possible, utilize a screwdriver or prying device to triumph and ultimately keep going a bit back on.
- Be cautious, as this is the most troublesome step. On the off chance that you drive the devices excessively far, you risk popping the new internal cylinder.
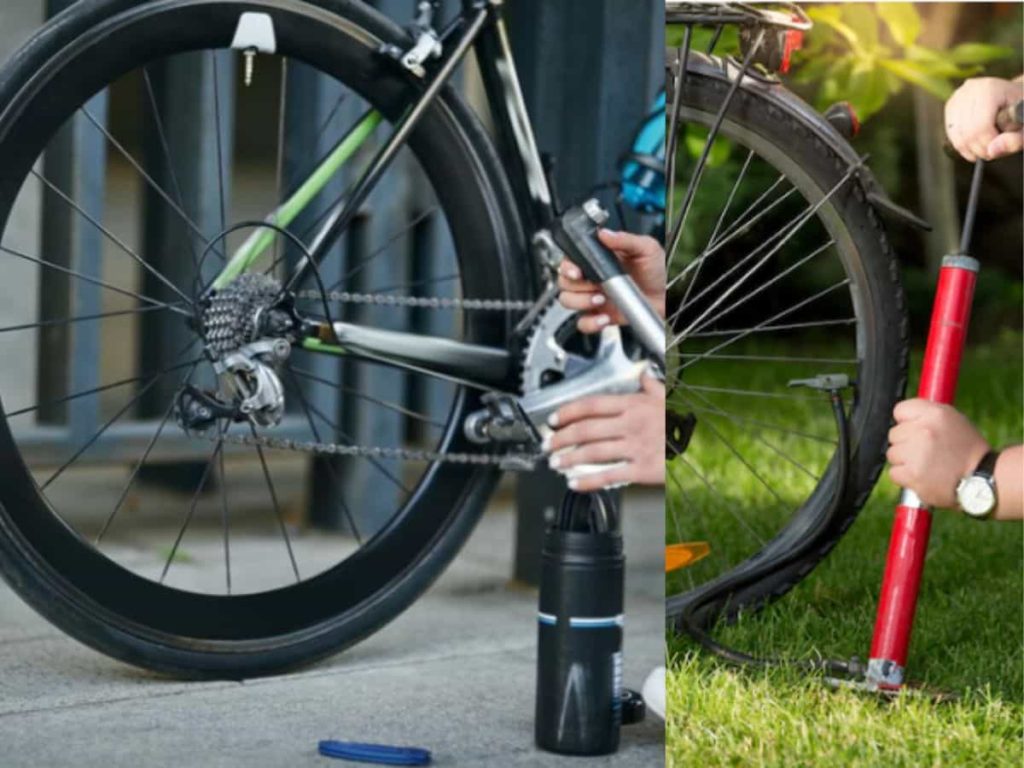
Stage 6: Inflating The New Inner Tube
- Utilize a siphon or air blower to swell the new tire
- Set the clasp and cap back on and you’re done
Stage 7: Troubleshooting
- There might be different issues making your inward cylinder turn level. In the event that your internal cylinder goes level again in the wake of following this instructional exercise, it might have been broken, or something on the tire/edge might be sticking into the inward cylinder.
Check Out The How To Replace Bike Tube Guides:
Eliminating an inward cylinder for fix or substitution can in some cases be a genuine battle however with a touch of persistence and a couple of expert tips, you can make things significantly simpler for yourself.
Our tech group is turning tires and cylinders consistently so here are their top tips to take care of business.
Assuming you’re searching for more supportive upkeep exhortation, Cyclingnews is presenting to you a progression of guides with the goal that you can figure out how to change the inner tube on a bicycle undertaking yourself. Look at different aides that are accessible:
Devices Required For Change Bike Inner Tube
On the off chance that you can get the tire on and off without switches then that limits the coincidental squeeze risk, yet that is a really difficult request with a few tire and edge blends. Put resources into quality switches, as modest ones can curve or snap, and be careful with outdated metal switches, especially on the off chance that you’re utilizing carbon edges.
You likewise need a good siphon. A hand siphon will be fine for lower pressures on a rock bicycle, yet in the event that you’re going as many as 60psi, a legitimate studio track siphon makes things a lot more straightforward. Clearly, you’ll require a new internal tube that is the right size for your tire and has the right valve type and valve length. Here’s how to change the inner tube on a bicycle.
1. Flatten The Tire
You, right off the bat, need to eliminate the wheel from the bicycle. Presently on the off chance that the tire isn’t as of now completely emptied, let the air out of the inward cylinder by slackening the little barrel at the highest point of the Presta valve somewhat and afterward squeeze it down. Presently unscrew and eliminate the knurled collar at the foundation of the valve.
In the event that you’re chipping away at a youngster’s bicycle or trail-blazing bicycle with the vehicle-style Schrader valve, then push down the pin in the focal point of the valve to let the air out.
2. Unseat The Tire
With the innertube flattened, crush the tire inwards to drive the globule into the focal point of the edge. Do this as far as possible around the tire on the two sides so it feels loose on the wheel.
3. Eliminate The Tire The Hard Way
In the event that the tire is a free fit, you can lift the entire wheel by the tire and give it a shake to get all the leeway to one spot. Any other way, you’ll need to gather that slack physically by pushing the tire around the wheel in the two bearings at the same time, expecting to make it as loose as conceivable when your hands meet again at the lower part of the wheel.
In the event that there’s a lot of slack or you’re simply serious areas of strength for feeling, the edge of the tire off the edge with your thumbs. This isn’t just about flexing your abilities and ligament strength, it additionally eliminates any possibility of catching the internal cylinder between the edge and the tire switch, and penetrating it. It merits persisting if possible.
4. Utilizing Tire Switches To Eliminate The Tire
Try not to be embarrassed assuming you want to utilize tire switches however, simply watch out. Sneak the two switches under the dab around 2cm/1inch separated with the spoon side snaring under the globule of the tire. Ensure you haven’t caught the internal cylinder against the edge with the opposite side or you’ll make another cut you want to fix.
Press one of the switches down to lift the tire edge over the edge, then press the subsequent one down to pull a more extended segment of the tire clear. Snare one of the tire switches around the closest address holding the tire back from crawling back onto the edge.
On the off chance that the tire is truly close, you could have to utilize the two switches at the same time to pry the tire over the edge. In the event that you’re utilizing two switches to work away at an exceptionally close tire, be cautious, as there are many times a gamble of things going flying. Heads up and keep the risk zone away from resources.
5. Eliminating The Internal Tube
Presently work around the entire tire with the switches until it’s totally off the wheel as far as possible around. Leave the most distant side of the tire set up and push the valve back through its opening before delicately hauling the inward cylinder out.
6. Examine The Tire
With the internal cylinder eliminated, it’s a great opportunity to really take a look at the tire for any harm or parts in the track. Check for thistles, nails and so on that could have entered through to within and eliminate them, any other way they’ll penetrate the new internal cylinder when you put it in.
Be cautious on the off chance that you’re running your finger around inside the tire without looking first, as you would rather not cut yourself! Check the edge of the wheel for breaks, marks, or sharp edges as well.
Fitting A Fresh Inner Tube On Bike
1. Position The Tire
On the off chance that it isn’t now arranged, pull the tire around so the name or logo coordinates with the valve opening. It makes it a lot simpler to find the valve in a rush, gives you a simple reference point for tracking down penetrates, and is more appealing in pictures as well.
2. Fit The Cylinder
To decrease the gamble of squeezing, swell the internal cylinder enough for it to take some shape. Eliminate the strung collar, saving it convenience for some other time, and afterward push the inward cylinder valve through the edge. Knead the inward cylinder into the gut of the tire, so it doesn’t drive out past the edge brink. Be careful as you do this, and try not to curve or squeeze the inner tube.
3. Fit The Second Side of The Tire
Beginning inverse the valve utilize your thumbs to begin convincing the tire back onto the edge. Assuming that you’re working with tight tires, recollect how you moved the leeway of the tire into one spot before the expulsion, and attempt to copy that development as you push the tire back onto the edge.
You need to be left with however much leeway as could reasonably be expected for the last piece of the cycle. Be really mindful so as not to trap and penetrate the internal cylinder between the dab and the edge.
4. Fitting A Tire With Tire Switches
Attempt to get the tire on with your thumbs to the extent that white knuckle, ligament stressing assurance will take you. At the point when you truly can’t get it on any further by hand embed the switches cautiously under the tire edge. Position them about an inch/2.5cm from each unfitted end. Support one switch against the tire to stop it from slipping back and afterward utilize the other switch to lift the tire onto the edge. Substitute this activity by working inwards towards the valve.
5. Cautiously Swell The Tire
When the tire is on, twofold check that there are no pieces of inward cylinder jabbing out. Push the valve back into the tire to make sure that it’s not caught and afterward string the lock ring back onto the valve to get it into the edge.
Continue to check as far as possible around as you slowly blow up the internal cylinder, looking for any inward cylinder hernias or bizarre lumps and knocks in the tire. Increment strain until the tire jumps into place by and large around the wheel, involving the line on the base edge as a manual for really take a look at its appropriately situated as far as possible around.
6. Last Checks
With the tire up to the right tension, eliminate the siphon and twist the wheel twofold really look at the arrangement both side to side and in an upward direction. In the event that there’s anything strange going on, collapse and back rub the impacted region to re-focus the cylinder and tire before re-swelling.
When you’re glad that everything is settled, you’re prepared to ride. Ensure you check the tire regularly on the principal several rides, in the event that something escapes place. At last, consistently take a look at the two tires for strain, harm, or trash after each ride.
Conclusion
Did you appreciate following the basic strides above?
However long you know How To Change The Inner Tube On A Bicycle, nothing can stop you regardless of whether your tire gets penetrated on your next bicycle ride.
Remember that supplanting bicycle inward cylinders isn’t overly complicated, and everybody can do it all together all alone.
We’d likewise very much want to hear from you! Thus, let us in on how changing your bicycle’s inward cylinder went. On the off chance that you have any ideas for other bicycle proprietors, share them in the remarks segment. Sharing this article can likewise help us a ton, so we’d significantly see the value in it.
Presently you know How To Change The Inner Tube On A Bicycle, and you ought to be prepared to take your recently fixed bicycle out for a test ride!
In the event that this is your most memorable time changing a bicycle’s inner tube, it might appear to be an overwhelming cycle with a ton of data to take in, and it could take you a short time to own it.
However, recall, changing a bicycle inward cylinder gets speedier and more straightforward each time you make it happen – all of a sudden, you’ll require only a couple of moments in the wake of experiencing a cut to get yourself back out and about once more!
“Assuming You’ve Found This Article Helpful, Why Not Check Out Some Of Our Other Expert Cycling Guides Below”.


