
Hey Everyone, today I am going to tell you about one question which is How to Remove a Bike Chain? Well, you are here because you want to know the answer of this question. But don’t you worry, here I will explain in detail How to Remove a Bike Chain?
The specific bike chain removal tool is invented to make it simple for you to remove the chain from your bike and make any maintenance required. But it is still possible to remove the chain from your bike with the equipment you probably have at your home.
There are several methods available for bike chain removal. I will show you multiple bike chain removal tools with the picture. While the running of a bike, the chain will stretch after some time. if we not tight this chain then it will come out from the sprocket of bicycle or bike. it guides to making an accident also.
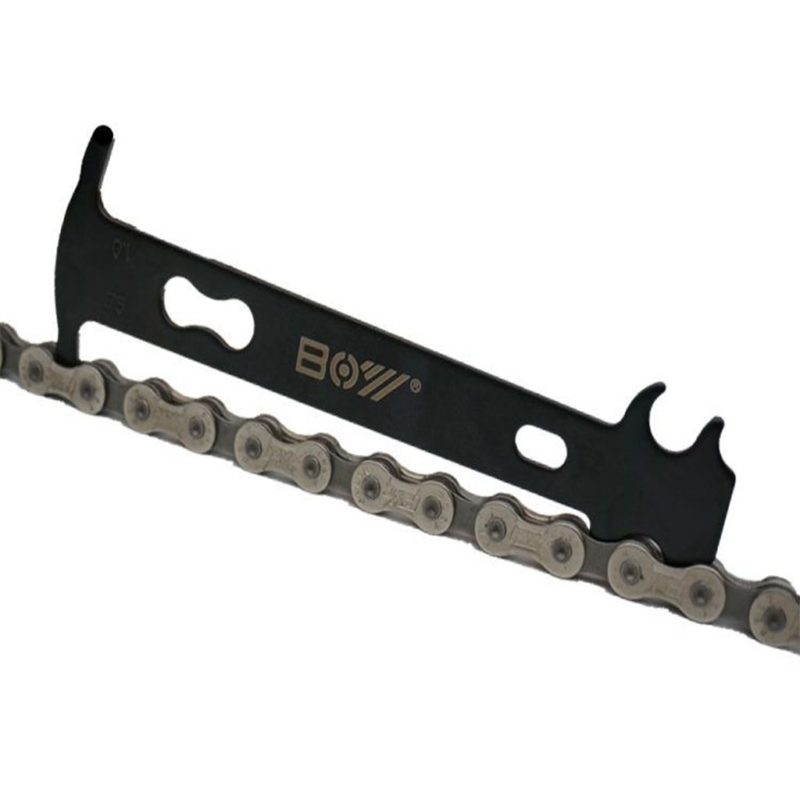
If the chain of your bike 12 link length is more than 10 inches than it means that your chain is worn out. you have to replace your old chain with a new chain.
Seldom we have to make the Electric bike, Motorized Bicycle in bike that time we have to remove or shorten the chain link. At the site Bestcomfortbike.com we show you how to replace a bike chain.
Table of Contents
Tips on How to Remove A Bike Chain
If your bike chain is disturbing and clamorous or you experience infirm shifting on your bike, it may be time to renew the chain. You can use needle-nose pliers to remove the master link on your chain or a hammer if there is no master link.
Bike chain removal tool
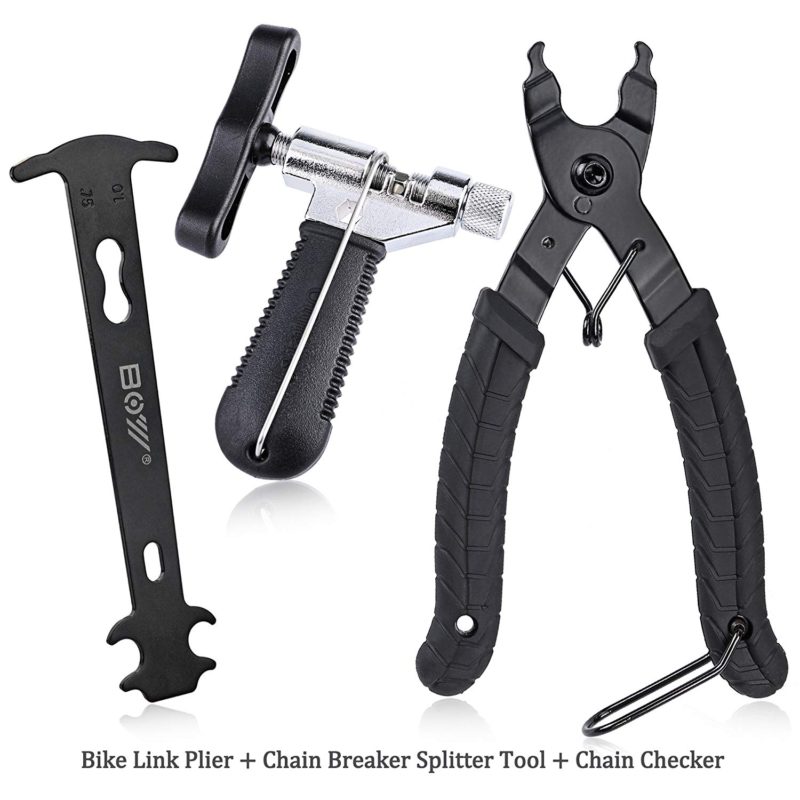
To remove the chain from a bicycle, need some tool. it can also be removed by some judged if you do not have that tool. I will show you both the method to remove and shorten the bicycle chain.
How to shorten or remove the bike chain in 4 steps
The first step to removing or shorten the bike chain is finding the master link.
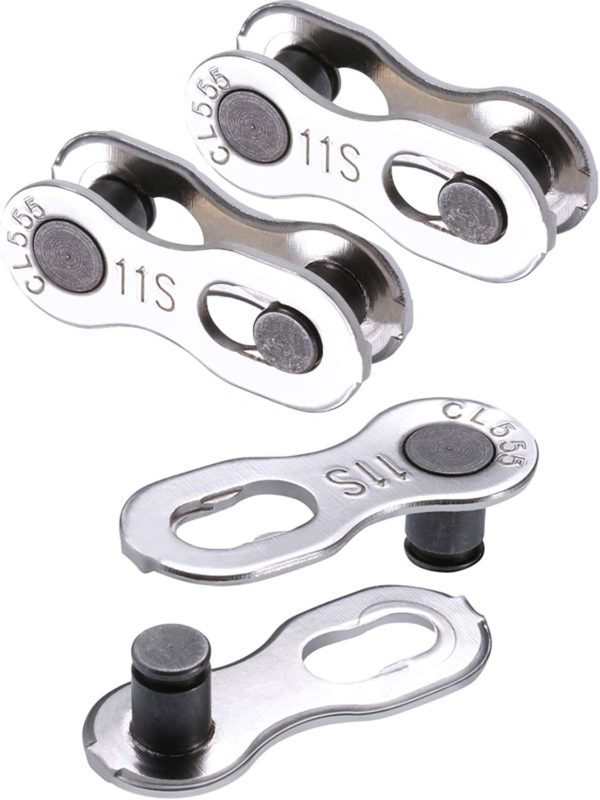
1: Find the master link

We need to find out the master link to remove the bike chain. It looks a little bit different than other links. if it is difficult to find then clean your bike chain first. I have shown you the picture below of the master link.
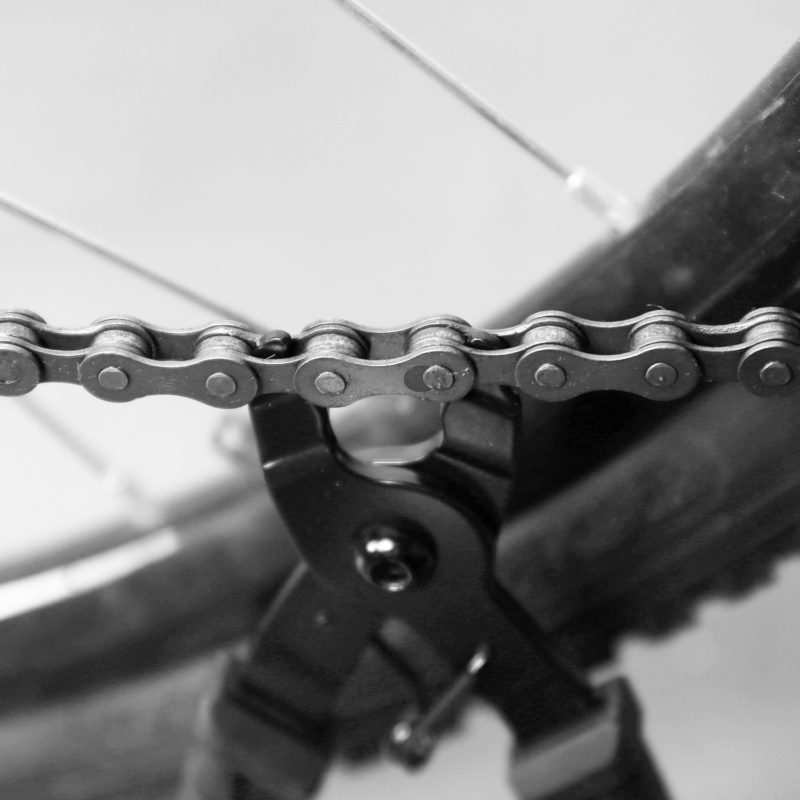
2: Use pliers to remove link
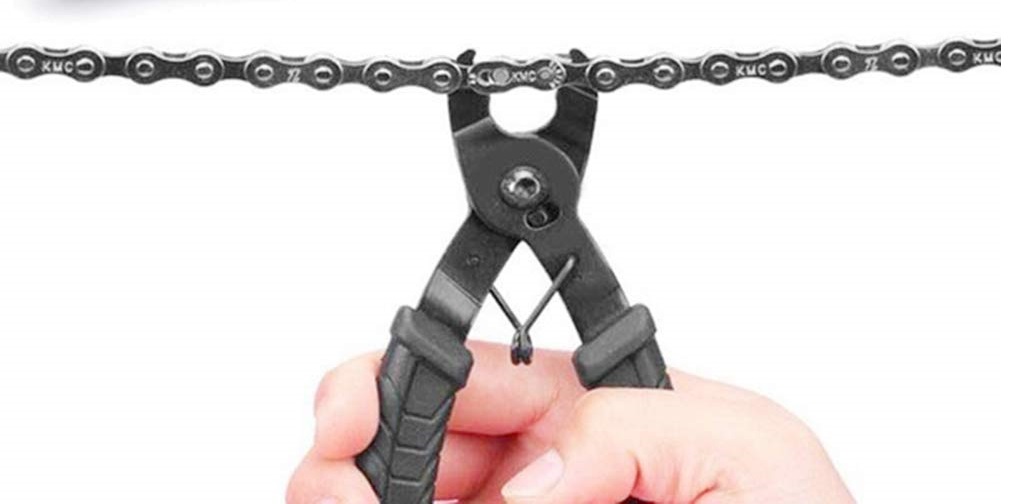
The Master Link is removed by inserting link pliers among both ends of a master link and push the pliers in so pin of the link come towards and comes out of the plate. You can also use regular pliers having a tight end.
After the master link removed it look like that
3: Chain parts
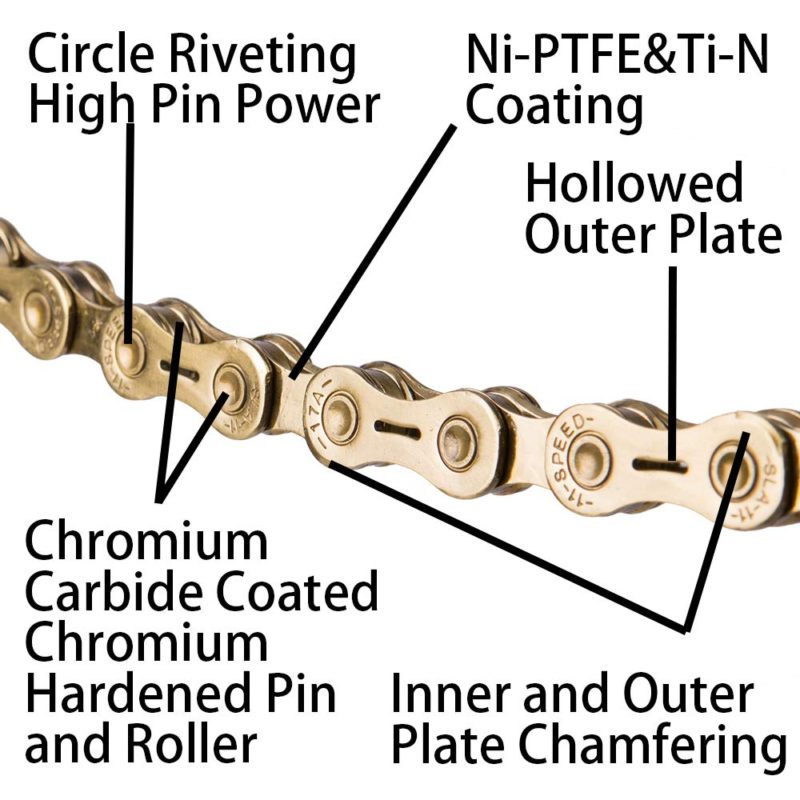
The chain has four parts:
1: pin
2: inner plate
3: outer plate
4: roller
4: The chain breaker
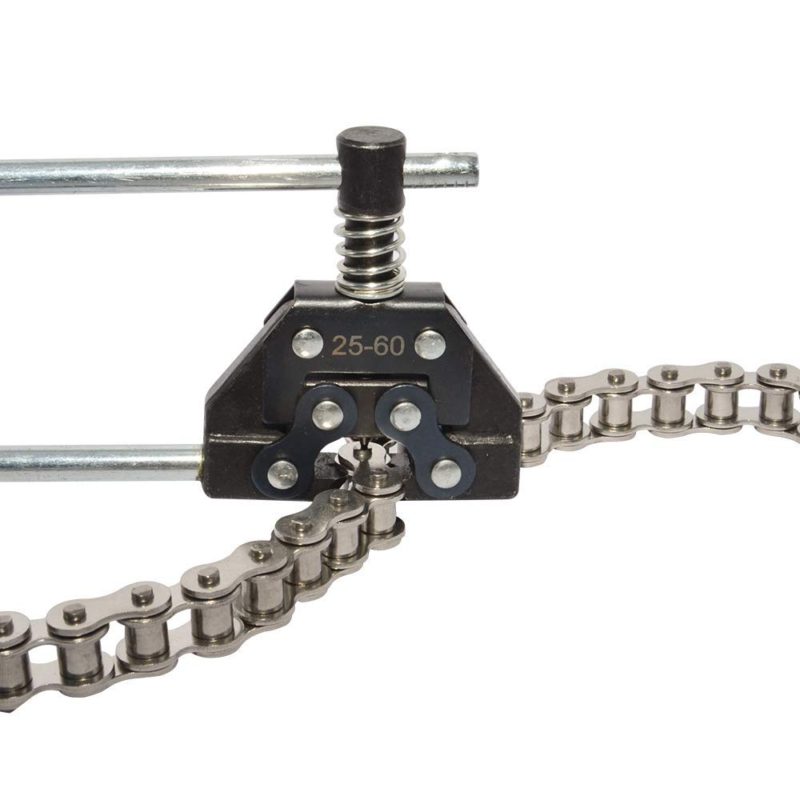
The Chain breaker tool is used to open the chain link. The Chain breaker pushes the pin from the chain link and it will release the two links. So, you can remove the links that you have to shorten. also, you can adjust those pins with the help of a chain breaker tool by entering a pin between the plates.
How to open a master link without a tool breaker
If you do not have a chain breaker tool than you do not have to worry about it. you only need
three things that are written bellow to remove the chain link.
- Nut
- Pin
- Hammer
Put chain-link above the nut. That chain pin must match with the nut hole. Put the sharp edge pin on the pin of the chain and then use the hammer force on a sharp edge pin and the chain pin will come out from the plate of a chain.
Maintaining Your Bike Chain
If you are regularly riding your bike, the chain may be coated with dirt and soil from the roads and tracks. Depending on the environment where you live, the chain may also start to rot or get dry building shifting speeds daring and exhausting out the chain.
You must keep your bike chain clean and oiled so that it serves longer and goes for a safer and quieter ride. To clean your bike chain, flip your bike upside down so that it holds on its handlebars. Use a cloth to wipe all of the excess grime from your chain. You may need to use a degreaser if your chain is very dirty. Pick a thin lubricant designed for bikes and spray the whole chain. Wipe off any excess lubricant.
Tips about maintaining the bike
If you are not sure what type of lubricant or degreaser to apply, discuss your local bike shop. They will help you to pick the best alternative for your requirements.
How to replace a bicycle chain in 8 steps
Unless you have worked in a bike workshop, you had been shocked at the outrage displayed by many cyclists upon studying that their chain is worn to oblivion and demands replacement, particularly in the winter when muddy roads take their toll.
Notwithstanding being constructed of hardened steel, no matter how properly you look after this set of links, pins, and rollers, the day will ultimately come when it is ready to be recycled.
Routine cyclists should finance in a chain checker. This simplistic widget slots between the chain’s rollers to give you accurately gauge how worn it is, using the guesswork out of reporting when yours is ready for removal. Let a chain become too knackered and shifting will experience and your gears may even slip under the load, probably ending in an accident.
Replacing it before it is too trashed is also a good idea as an extremely worn chain will soon eat into more rare cassettes and chainrings.
Once those bits are tired out they will need swapping, too. Nevertheless, get the chain early and they will serve several times more, and save your money.
The time needed: 15 minutes
Money saved: around £8
You will need: A new Chain and Chain Tools
1: Remove the old chain
Firstly discard the old chain. If it has a two-piece link that can be squeezed together to unfasten it. you can shorten this to split the chain. We are working on a Shimano chain – like many brands, you’ll need to use a chain tool to force one pinout to divide the chain. Slot the links between the points of the tool and twist it till the pin pops out.
2: Clean the cassette
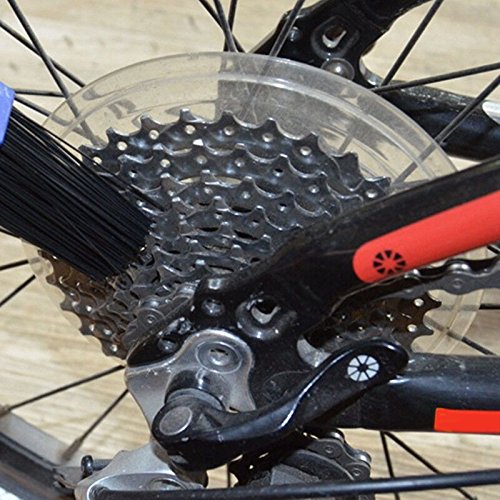
Now it is a good time to clean and examine your chainrings and cassette. Check that the outlines of all the points are balanced. Once excessively worn, they start to take on an outline like a shark’s tooth as the chain eats into them. Considering everything looks good, scrub both down with some solution – no point implementing a clean chain onto dirty cogs.
3: Thread the new chain
Move down to the tiniest sprocket and chainring. Thread the new chain by the front derailleur cage. Next, drag it over and loop it across the rear cassette and round the top jockey wheel on the derailleur. Thread it through the cage, staying careful to keep inside the divider between the plates, and then throughout the lower wheel.
4: Work out correct length
Your new bike chain will require to be cut to size. With the chain, almost the smallest sprocket and chainring, pick the ends together so they join below the chainstay. You desire to find the highest achievable length that still produces some tension on the rear derailleur so that it would not drag. Remember, you will need to join an internal link to an external one.
5: Cut to size

The Shimano suggests that the open end faces behind. Should note the link that you need to cut, it is time to clutch the chain tool one more time. Cut the link you want to work on in between the jaws of the tool. Turn the handle till the pin begins to push the middle of the link, Be careful that everything is adjusted so as not to break the tool.
6: Insert the pin
Now discover the pointy end of the joining pin that appeared packaged with your new chain. Take the ends of the chain and slot them mutually. Overlooking the bike from the drive side, force the pin into the chain to keep it together. It should stay in position without you requiring to hold it. Pick up the chain tool one more time and untwist the handle a few turns.
7: Pushpin to home
Now Slot the link attached with the pin into the chain tool. Twist the handle down to drive the pin home. As the pin becomes approximately flush with the outer plate of the link, it will become simpler to turn the handle. Work very gently – you need the end of the pin to be precisely flush with the outside of the plate. Once it is there, pushes the chain tool out.
8: Everything has done
After all done Check the link you have entered moves smoothly. If it does not move properly and the pin is pointing more than the others in the chain, reattach the chain tool and give it a slight pressure. If it seems to be in the right position, try flexing the chain horizontally to free it up. Once you are happy, snap the end off the back of the pin by giving it a sharp push using the back of the tool.


